In the last post I talked about SketchUp and Layout and how those two programs in one work very well for creating 3D models and then the working drawings that are often necessary to build the object you have created.
This week I want to talk about one of the many plug-ins that work with SketchUp. One complaint I have heard from some people about SketchUp is that it looks “too sketchy.” I actually think that the ability to make the design look more hand drawn is a plus to me as I have found that some people just do not respond too well to the “cold” look of a computer generated design. (In a later post I will talk about the “Style Builder” part of SketchUp.)
So, in response to those people who think SketchUp can only do “sketchy” there are programs that work within SketchUp and are often referred to as plug-ins. One of my favorites is a program called Twilight. No it is not the teenage angst/vampire love saga, but a program that allows you to place lighting throughout your model, adjust details on textures (which I will cover in a moment) and then render the image. This results in a nearly photo realistic image.
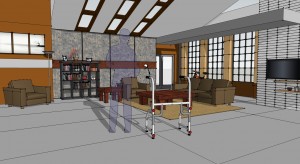
Here is an example of a set I designed for a TV commercial created in SketchUp:
As you can see by this image, the design is pretty straight forward. It is meant to be an apartment for a single man that was built into an existing loft space. There are large windows and a vaulted ceiling with skylights. Most people would look at this and be able to see the space very easily.
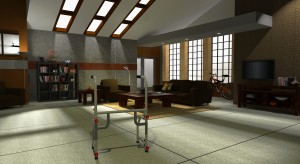
There are times, however, that you need to create a rendering that shows the space in a more realistic look. This is where a program like Twilight comes into play. By placing the lights where you want them to be, determining the color and focus of the lights and then when you render it, the result of this work is shown below:
As you can see, the way the light interacts with the models and the textures (yes, of course textures make a HUGE difference in how a model looks when it is rendered!), does make the image look much more realistic.
In later posts I will talk specifically about how Twilight works and how you can use it to create images like the one above.


